アプリ(入力モードをハックする)
Top
 インストール
Python #1 入力モードをハッキングするアプリ
Pythonでアプリを作成してみよう、
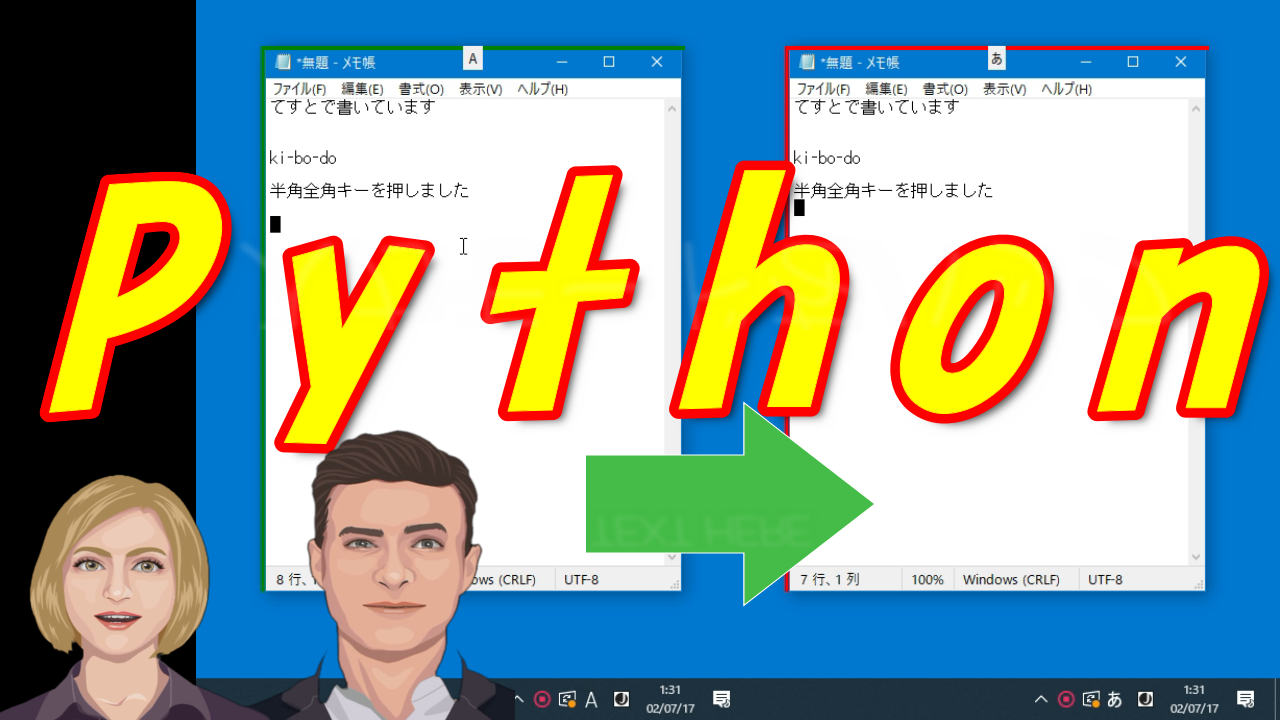
入力モード(半角/全角)をウインドウ枠の色で判別するアプリです。

判定には、PyAutoGuiのlocateOnScreenを使用、
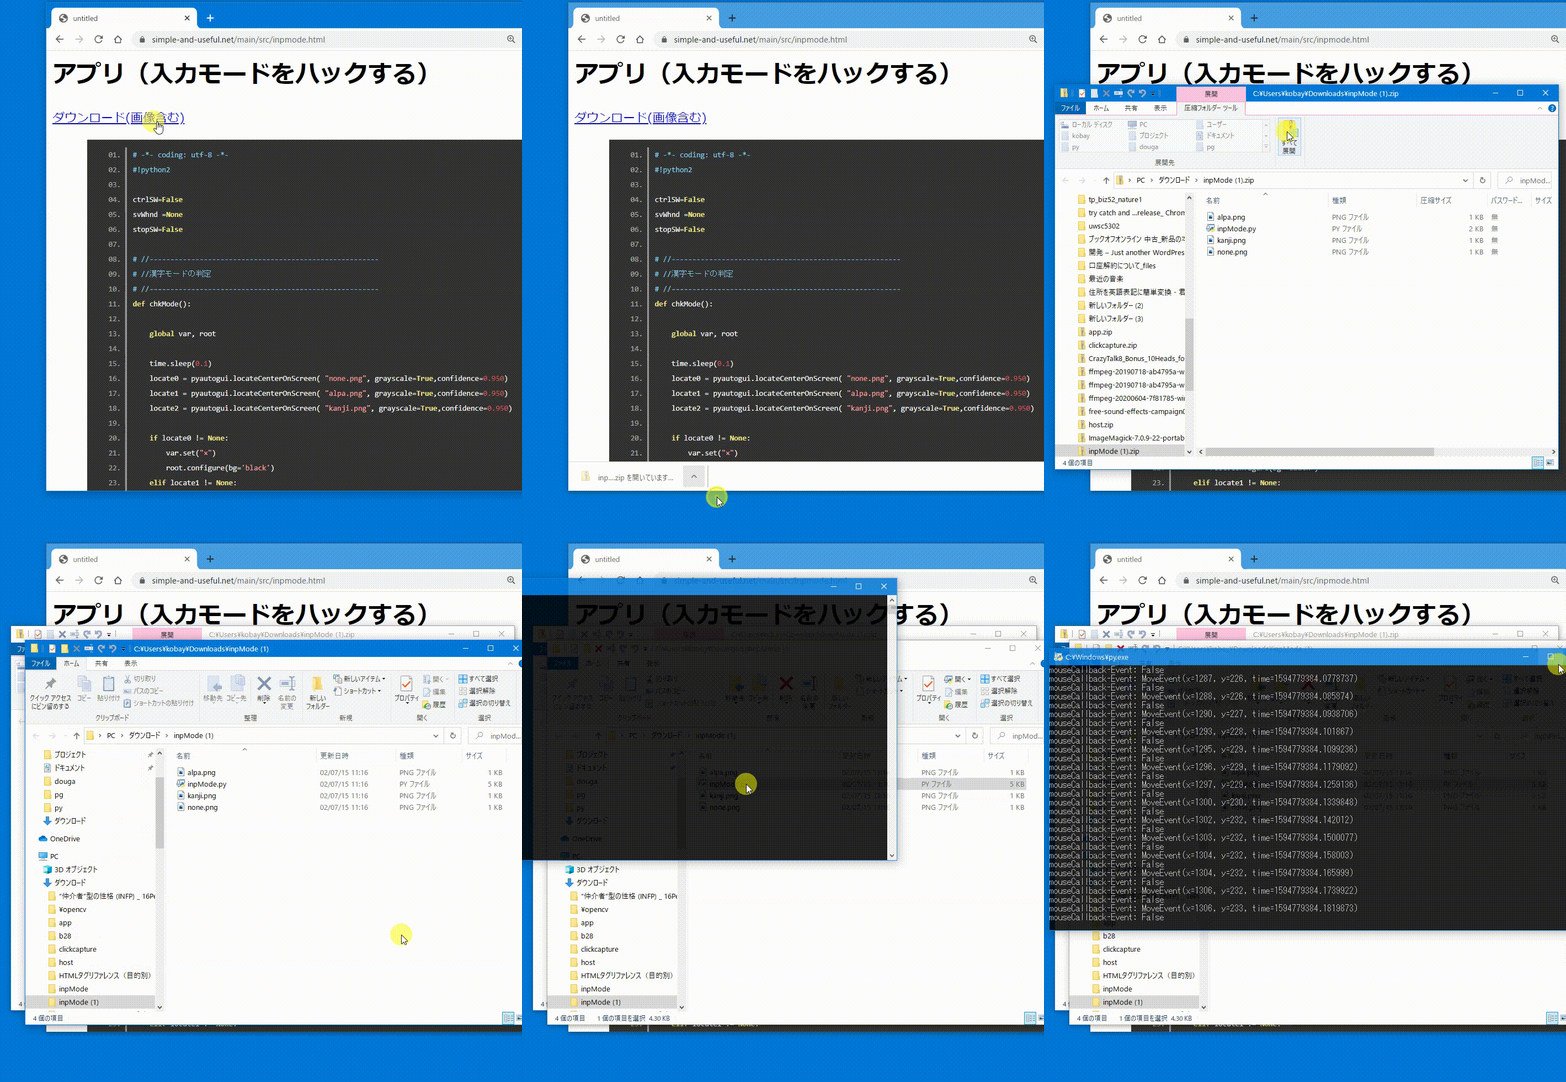
すべての解説はできませんので、ソースコードをアップします。
見てみて下さいね!
https://simple-and-useful.net/main/src/inpmode.html

機能について
ウインドウをクリックして選択すると、ウインドウ枠が表示され、
この色によって現在漢字モードかどうかを識別することができます。

コントロールキーを押しながらウインドウをクリックすると、
ウインドウ枠に色が付きます。
終了は、上のラベル「あ、A、*」をクリックです。
デスクトップ、タスクバーをクリックすると、画面の左上に小さく表示されます。
使用するモジュール

Tkinter
クロスプラットフォームなGUIライブラリ

PyAutoGUI
マウスやキーボード操作の自動化

win32api,win32gui
PythonでWindowsのAPIを可能にする

mouse,keyboard
マウス操作をフックして監視したり、
マウス操作を行う事もできます


-----------------------------------
画像位置を取得する

モジュール PyAutoGui

座標位置 = locateOnScreen
      ( "none.png",
		grayscale=True,
		confidence=0.950,
		region=(0,0, 1920,1080 )
		)
-----------------------------------
次は、入力モードの判定ですね!

locateOnScreenは、\n画面から指定画像の位置を求めるもので、
画像が一致しない場合は、Noneが返ります
これで漢字モードがどうかを判定しています。

引数には、\ngrayscale、confidence、regionが、
あります。
fgrayscaleやregionでスピードUPできます
動画の字幕
整理されていませんが、何かお役に立てば!
$100
-----------------------------------

入力モードをハッキング
-----------------------------------
f入力モードをハッキング
漢字変換モードを判定して、\n見やすくするアプリを作ってみましょう!


$200
-----------------------------------
[入力モード判定アプリ]

-----------------------------------
チョットこれを見てくださいね
アプリを起動すると左上に小さいラベルが出てきます
コントロールキーを押しながら、ウインドウをクリックします
f何かでましたね
このウインドウ枠の色で判定ができますよ
切替えてみますね
fいいですね、赤が漢字モードかぁ
終わりにしたい時は、ここをクリックします


$300
-----------------------------------

漢字入力モードかを判定する
-----------------------------------
今回は、このアプリを作ってみましょう!
f漢字入力モードかを判定するアプリですね
ソースファイルをネット上に上げてありますので、
参考にしてみて下さい
f変更して自分好みしたいです
是非、頑張ってね!


#98 0.5 1,97 0.8 0.5
$400
----------------------------------------------
アプリの仕組み
 ウインドウがクリックされたら
 コントロール押下をチェックして
 ウインドウ枠を表示

 半角/全角キーが押されたら、
 入力モードを調べて
 ウインドウ枠の色を反映させる

----------------------------------------------
fプログラムは、どのようになっているのですか?
マウスとキーボードをフックして監視します。

マウスのクリックとコントロールキーをチェックして、
クリックされたウインドウに枠を表示させます

半角/全角キーが押されたら、
今の入力モードを調べて、
モードによりウインドウの枠色を変えています。
f大変そうだなぁ

色々なモジュールを使用して実現させてまぁ~す


$500
-----------------------------------
使用するモジュール

Tkinter
クロスプラットフォームなGUIライブラリ

PyAutoGUI
マウスやキーボード操作の自動化

win32api,win32gui
PythonでWindowsのAPIを可能にする

mouse,keyboard
マウス操作をフックして監視したり、
マウス操作を行う事もできます


-----------------------------------
使用するモジュールの説明をします
fTkinter
クロスプラットフォームなGUIライブラリですね
Windows,Mac,Linuxでも動きます
fウインドウを作成したい時に使うのですね
fPyAutoGUI
マウスやキーボード操作の自動化ができるモジュールです
画像認識ができるので便利です

fwin32api,win32gui
PythonでWindowsのAPIを使う事ができるモジュールです


fmouse,keyboard
よくある名前で迷いそうですが、これはモジュールですよ
マウス(キーボード)操作をフックして監視したり、
マウス(キーボード)の操作を行う事もできます
f操作の自動化ですね


#98 0.5 1,97 1 0.8
$600
-----------------------------------
Tkinter
root  = tkinter.Tk()
root.geometry('20x20+0+0')
root.overrideredirect(True)
root.wm_attributes("-topmost", True)
root.configure(bg='white')
root.wm_attributes(
   "-transparentcolor", "white")


-----------------------------------
Tkinterは、ウインドウ表示ができる\nGUIのモジュールです
今回は、透明なウインドウ枠を表示しています
fウインドウとは、思えなかったですねぇ~

では順番に、
ウインドウの位置とサイズ
f幅、高さ、X座標、Y座標
ウインドウのタイトルバーを消しています

ウインドウを最前面に表示
fあっ、いつも上に表示されて邪魔な奴にするのですね
いゃいゃいゃ
最後は背景色の設定とウインドウを透明にします


#98 0.5 1,97 1 0.6
$700
-----------------------------------
ラベルの設定
var = tkinter.StringVar()
var.set("*")
lbl = tkinter.Label(root, textvariable=var )
lbl.pack( anchor ="s")

※処理中に、「var.set("??")」で変更が可能
-----------------------------------
ラベルを変更する場合は、ちょっと面倒かもしれないね
fStringVarで作成したオブジェクトにsetすれば、\n変更できるのですね。
ラベルに固定文字を表示するだけなら、簡単なんだけどね!


#98 0.5 1.0,97 1 0.9
$800
-----------------------------------
入力操作の監視

バックグラウンドで、マウス操作を取得
 mouse.hook( mouseCallback )

(キーボード操作取得)
 keyboard.hook( keyCallback )

-----------------------------------
f入力操作の監視ですね
このメソッドは、バックグランドでマウスの操作を
取得する優れもんだよ
fそぅかぁ~、普通アプリは自分で\nイベントを処理しているもんね
そう、裏で盗み見ているような感じかなぁ~

引数には、呼び出される関数を書いてくださいね
f呼びだされるのかぁ~
マウス操作があったら、呼び出されますよ!


$900
-----------------------------------
キーボード操作を監視

def keyCallback( event ):

    if "ctrl" == event.name:
        if "up" == event.event_type:
            ctrlSW =False
            print("ctrlSW", ctrlSW)
        else:
            ctrlSW =True
            print("ctrlSW", ctrlSW)


#バックグラウンドで、キーボード操作を取得
keyboard.hook( keyCallback )

-----------------------------------
実際のコードで見てみましょう
event.nameがキーの種類で、
event.event_typeがキーの状態です
キーの状態とは、押されている、放されたがわかります
fこの関数は、コントロールキーが押されているかが、
fわかるのですね
hookは1回だけ書けば良いですからね
fキーボード操作があったら\n呼び出されるのですね


#97 1 0.8
$1000
-----------------------------------
画像位置を取得する

モジュール PyAutoGui

座標位置 = locateOnScreen
      ( "none.png",
		grayscale=True,
		confidence=0.950,
		region=(0,0, 1920,1080 )
		)
-----------------------------------
f次は、入力モードの判定ですね!
はい
locateOnScreenは、\n画面から指定画像の位置を求めるもので、
画像が一致しない場合は、Noneが返ります
fこれで漢字モードがどうかを判定しているのですね
はい、そうですね
引数には、\ngrayscale、confidence、regionが、
あります。
調整が必要ですね
fgrayscaleやregionでスピードUPできますね、
f最適なものを求めなきゃ!
ダウンロード(画像含む)
# -*- coding: utf-8 -*-
#!python2

ctrlSW=False
svWhnd =None

# //-------------------------------------------------------
# //漢字モードの判定
# //-------------------------------------------------------
def chkMode():

    global var, root, canvas

    time.sleep(0.1)
    # //locate0 = pyautogui.locateCenterOnScreen( "none.png", grayscale=True,confidence=0.950)
    # //locate1 = pyautogui.locateCenterOnScreen( "alpa.png", grayscale=True,confidence=0.950)
    # //locate2 = pyautogui.locateOnScreen( "kanji.png", grayscale=True,confidence=0.950, region(xx-100,yy-50,xx,yy))
    locate2 = pyautogui.locateOnScreen('kanji.png', grayscale=True,confidence=0.8,region=(xx-200,yy-50, xx,yy ))

    # //if locate0 != None:
        # //var.set("×")
        # //root.configure(bg='black')
    # //elif locate1 != None:
        # //var.set("A")
        # //root.configure(bg='green')
    # //elif locate2 != None:
        # //var.set("あ")
        # //root.configure(bg='red')
    # //else:
        # //var.set("*")
        # //root.configure(bg='white')
    haba = 4
    if locate2 != None:
        var.set("あ")
        # //root.configure(bg='red')
        col ="red"
        canvas.create_rectangle(haba, haba, tarW, tarH,   outline= col,    width="%d" %haba)
    else:
        var.set("A")
        # //root.configure(bg='green')
        col ="green"
        canvas.create_rectangle(haba, haba, tarW, tarH,   outline= col,    width="%d" %haba)


def timer():

    try:
        chkMode()
    except Exception as e:
        print(e )

    root.after(1000, timer)


# //-------------------------------------------------------
# //キー入力のイベント
# //-------------------------------------------------------
'''
    チェックするキー
     コントロールキー
     半角/全角
'''
def keyCallback( event ):

    global ctrlSW

    print( event )

    if "半角/全角" == event.name and "down" == event.event_type:
    # //if "半角/全角" == event.name:
        chkMode()

    if "ctrl" == event.name:
        if "up" == event.event_type:
            ctrlSW =False
            print("ctrlSW", ctrlSW)
        else:
            ctrlSW =True
            print("ctrlSW", ctrlSW)


# //-------------------------------------------------------
# //マウスのイベント
# //-------------------------------------------------------
def mouseCallback( event ):

    global ctrlSW,root,svWhnd, tarW, tarH

    # //print('mouseCallback-Event:', event )
    # //print('mouseCallback-Event:', type(event) == mouse.ButtonEvent      )

    whnd = win32gui.WindowFromPoint(win32api.GetCursorPos() )
    textName = win32gui.GetWindowText(whnd)
    className = win32gui.GetClassName(whnd)
    # //print( "textName", textName)
    # //print( "className", className)
    if "CiceroUIWndFrame" == className:
        time.sleep(0.2)
        chkMode()
        return True

    if type(event) == mouse.ButtonEvent:

        px,py = pyautogui.position()


        # //if event.event_type == "down" and event.button=="left":
            # //rect = win32gui.GetWindowRect(whnd)
            # //x = rect[0]
            # //y = rect[1]

            # //"""
            # //int cxSizeFrame = GetSystemMetrics(SM_CXSIZEFRAME); // 境界線幅X方向
            # //int cySizeFrame = GetSystemMetrics(SM_CYSIZEFRAME); // 境界線幅Y方向
            # //int cyCaption = GetSystemMetrics(SM_CYCAPTION);     // タイトルバーの高さ
            # //"""
            # //capH = win32api.GetSystemMetrics(win32con.SM_CYCAPTION)
            # //kyoY = win32api.GetSystemMetrics(win32con.SM_CYSIZEFRAME)
            # //ttlH = capH + (kyoY*2)
            # //print("ttlH=",ttlH)
            # //if (px >x and px < rect[2]) and ctrlSW==False:
                # //if py > y and py < y+ ttlH:
                    # //root.geometry( "20x20+0+0"  )
                    # //canvas.create_rectangle(5, 5, tarW, tarH,   outline= "white",    width="5")
                    # //svWhnd = None
                    # //return


        if event.event_type == "up" and event.button=="left":
            # //print("event_type", event.event_type )
            # //print("button", event.button )

            whnd = win32gui.WindowFromPoint(win32api.GetCursorPos() )
            textName = win32gui.GetWindowText(whnd)
            className = win32gui.GetClassName(whnd)
            # //print( "textName", textName)
            # //print( "className", className)
            if className == "Static":
                # //tkinter.messagebox.showinfo("終了", "終了します")
                root.quit()
                sys.exit()
            """
            if className == "TkChild":
                print("TkChild")
                # //pyautogui.hotkey('hanja')
                # //chkMode()
                return
            """
            if className == "MSTaskListWClass" or className == "SHELLDLL_DefView":
            # //if className == "SHELLDLL_DefView":

                root.geometry( "20x20+0+0"  )
                canvas.create_rectangle(5, 5, tarW, tarH,   outline= "white",    width="5")
                svWhnd = whnd
                return False
            """
            if className == "IMEModeButton":
                time.sleep(0.1)
                chkMode()
                return

            """
            rect = win32gui.GetWindowRect(whnd)
            x = rect[0]
            y = rect[1]


            if svWhnd == whnd:
                time.sleep(0.2)
                chkMode()
            else:
                if ctrlSW:
                    canvas.create_rectangle(5, 5, tarW, tarH,   outline= "white",    width="5")
                    tarW = rect[2]-x
                    tarH = rect[3]-y

                    root.geometry( "%dx%d+%d+%d" %(tarW-7,tarH-7, x+3, y) )
                    # //root.geometry( "10x20+10+10")
                    # //time.sleep(0.5)
                    chkMode()
                    svWhnd = whnd

    return True


import time,os,sys
import tkinter as tkinter

import mouse
import keyboard
import pyautogui

import win32gui
import win32api
import win32con

xx, yy = pyautogui.size()
print(xx,yy)
# //メインウインドウ用
root  = tkinter.Tk()
root.geometry('20x20+0+0')
root.overrideredirect(True)
root.wm_attributes("-topmost", True)
root.configure(bg='white')
root.wm_attributes("-transparentcolor", "white")

tarW =xx
tarH =yy
canvas = tkinter.Canvas(root, width=tarW, height=tarH, bg="white")
canvas.place(x=-2, y=-2)

#ラベル
var = tkinter.StringVar()
var.set("*")
lbl = tkinter.Label(root, textvariable=var )
lbl.pack( anchor ="s")

# //timer()
mouse.hook( mouseCallback )
keyboard.hook( keyCallback )
# //root.iconbitmap(default='/Users/kobay/Downloads/left.ico')
root.mainloop()
©2022 Kenji Kobayashi
YouTube
 インストール